
CloudFlare Tunnels
For more than a year we've been talking about using a reverse proxy to access your self-hosted apps via a domain name.
While that's been great, there are some issues with it:
1. You need to open ports 80 and 443 on your modem, router, firewall, and any other appliance that resides between your Docker server and the internet. There are security implications with doing this.
2. Because of the security implications mentions in the first reason (as well as any number of other reasons), many ISPs don't allow port forwarding or they deliberately block forwarding the required ports for self hosting.
That's why we're going to take a look at setting up remote access to your self-hosted applications with CloudFlare Tunnels. Using CloudFlare Tunnels allows us to create an encrypted connection between our server(s) and CloudFlare without the need to forward any ports.
This helps us keep our networks more secure while still having the option to self host to our hearts' content.
To establish this secure tunnel, we're going to use a CloudFlare Docker container called CloudFlared.
Cloudflared is a daemon that proxies traffic from Cloudflare to your server - so in this scenario you don't need to open any port on your server, so you are safer from unwanted visitors on your network.
Prerequisites
We only need 2 things to get things set up (aside from our Docker server and self-hosted apps):
1. A domain name from your favorite registrar
2. A CloudFlare account
Once you have those 2 things, you need to point your domain to CloudFlare. CloudFlare has a great resource on their website about how to point your domain to their DNS servers.
Getting Started
Once you have the prerequisites out of the way, the next thing you're going to do is head over to CloudFlare's Zero Trust dashboard.
On the left, click "Access" and then "Tunnels".
Then click the "Create a tunnel" button.
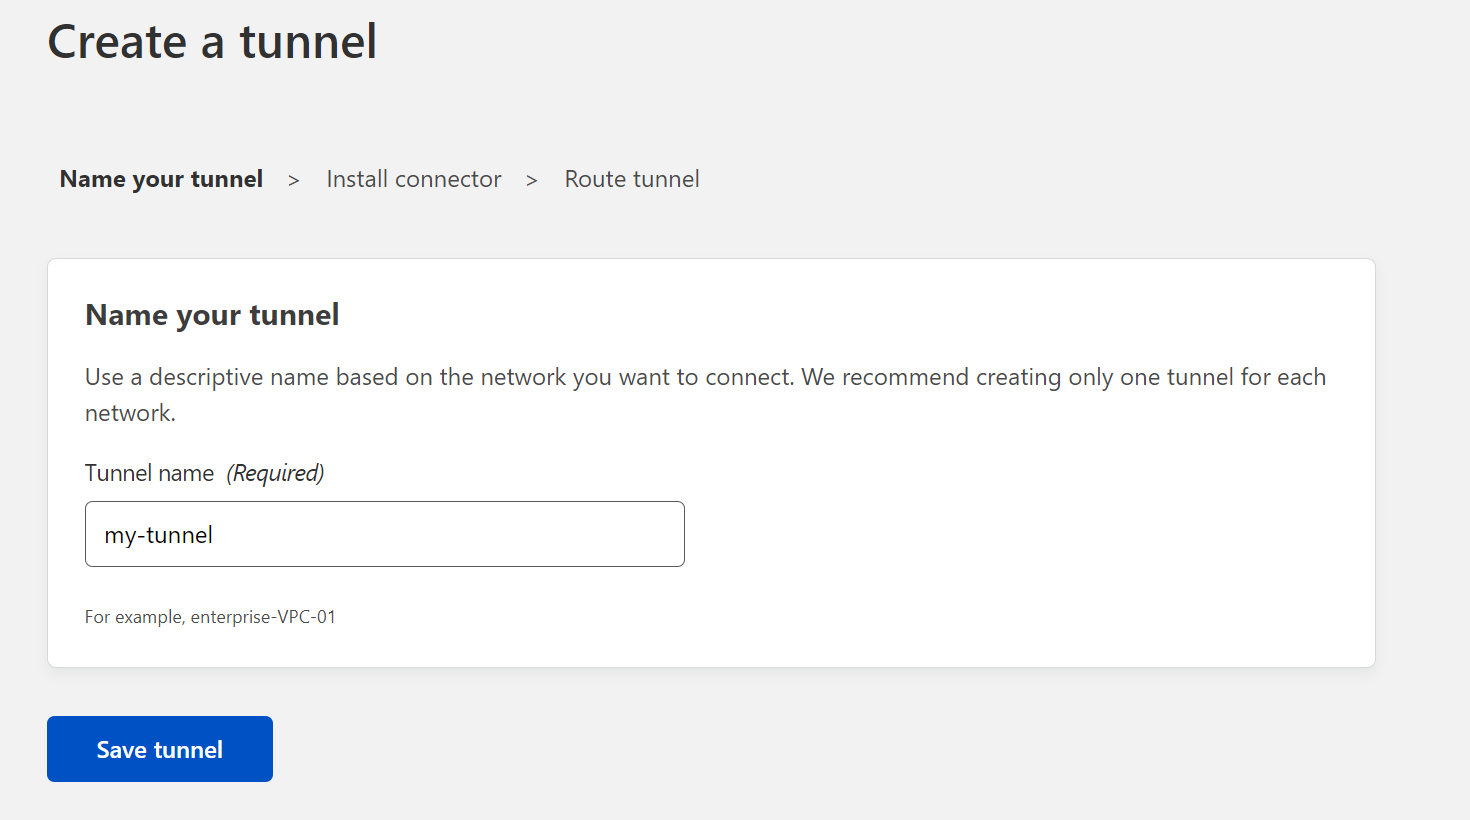
Give your tunnel a name and click the save button.
On the next page, click the "Docker" button. The screen will change and you'll see a Docker comman that you'll need to run:

Copy the docker run command and then log into your Docker server via the terminal.
Once you're logged in, paste the command you just copied and let the docker container deploy.
Once it's up and running, you should see that the "Connectors" portion of the "Install connector" page will update and show that things are connected.
Something to note here is that if you have multiple docker servers that you want to access remotely, you'll need to install the connector on each of the Docker servers in question.
Click "Next".
Now we're going to actually start routing traffic to our containers. You'll want to fill out the Public Hostnames information as shown in the image below:
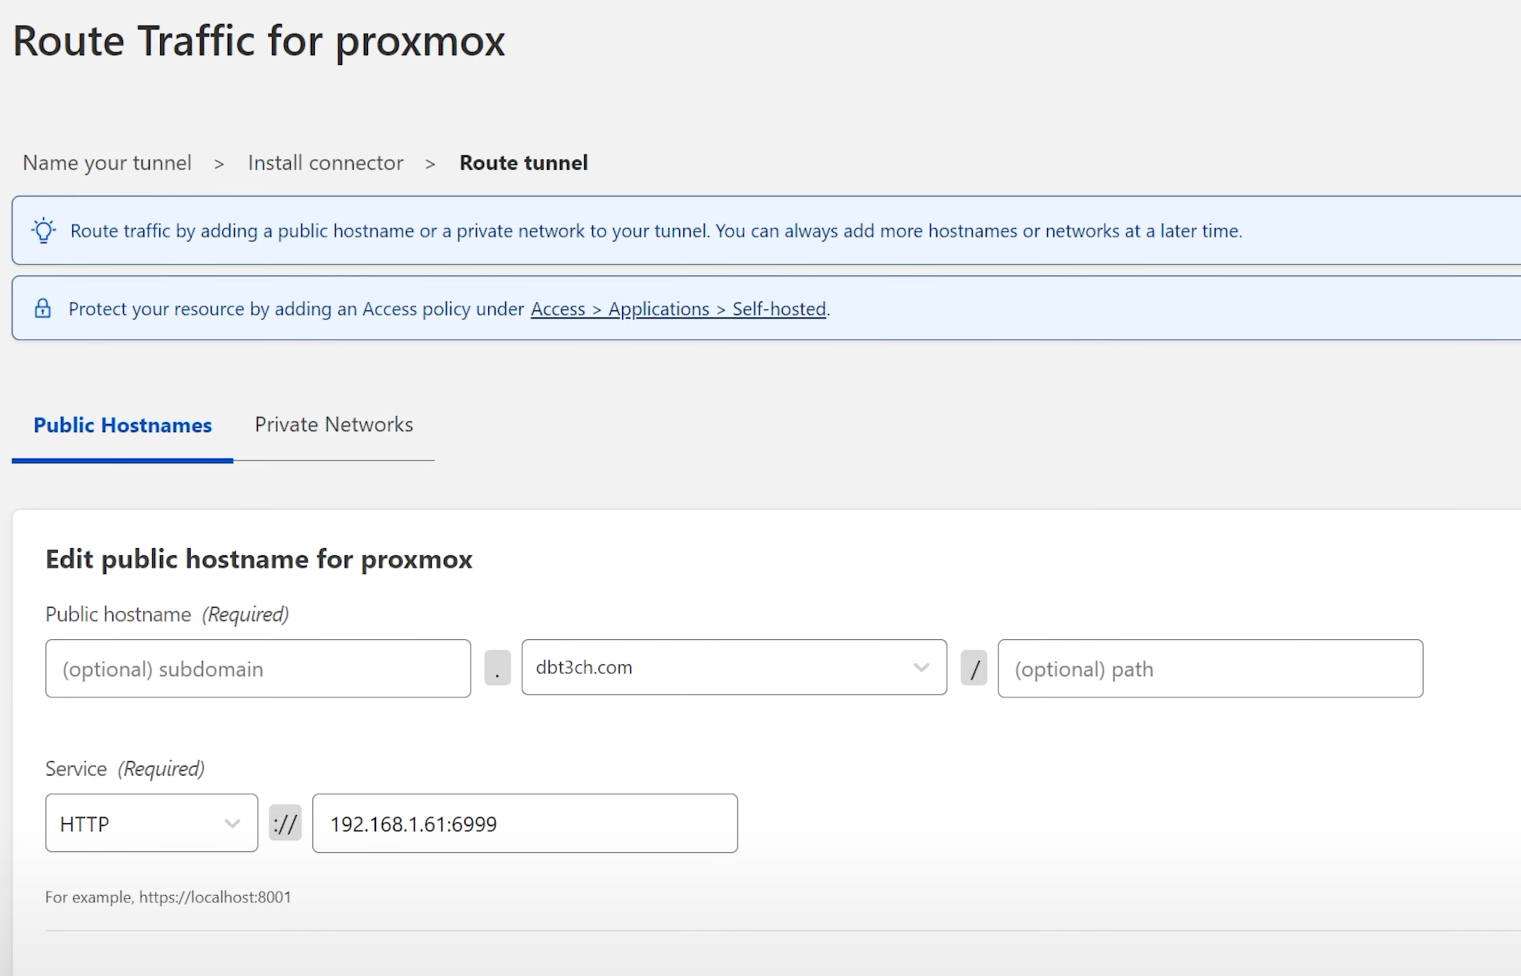
The example above shows setting up a root domain (dbt3ch.com), but the process is more or less the same for a sub-domain, just add the sub-domain portion in the subdomain box.
You'll select your service (http, https, ssh, rdp, etc) from the drop-down and then enter the ip address and port number of the application you want to access.
Another note: If you're going back and doing this on a domain that is already set up, you'll need to delete the DNS records from your main dashboard, otherwise you'll get this error:

Click the Save button.
Adding Security
At this point, your domain is set up and is technically functional, but you might want to add some security to it in order to restrict access by IP address or email address.
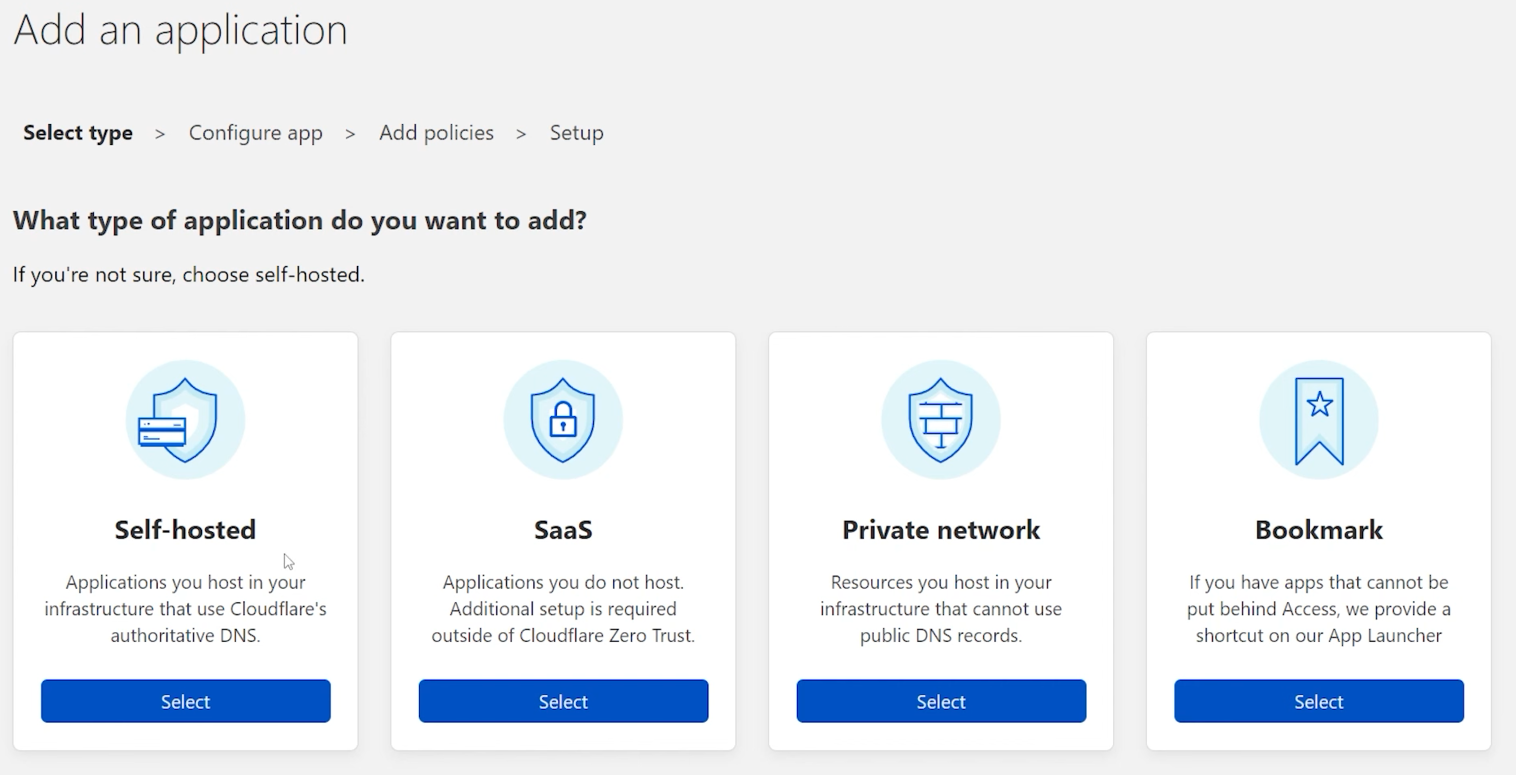
To do this, click the "Access" menu option on the left side of the screen and then "Applications".
Selec the "Self-hosted option:
On the next screen the boxes you're going to fill out are pretty self-explanatory:
1. Application name
2. Subdomain (optional)
3. Domain (select from the dropdown)
You can add an application logo if you want.
Click the "One-time PIN" option and then check the option right below it as well. Then scroll up and click Next.
Now we're going to decide how we want people to access our apps. For this example, we're going to restrict by IP Address.
I named the Policy "IP" and set the Action to "Bypass".
In the "Inlcude" section, I selected "IP ranges" and then put my home's IP address in the next box. You can enter multiple IP address in there if you want to have access from multiple locations.
Then click the Save button.
That's it. You can repeat this process as many times as you need to for as many Docker server and applications you have that you want to expose.
Once you've tested everything and are sure that everything works, the final step is to secure your network (at least a little more) by deleting the port forwarding for ports 80 and 443!